最近连续开发了几个小程序,总是有一些需要重复解决的问题,因此在此记录一下
自定义头部组件
我们开发小程序的时候通常是用的统一的头部,一般是白底黑字或者简单定义一下背景色和文字颜色,比如这样
在 page/example.json 中定义
1
2
3
4
5
6
7
8
| {
"usingComponents": {},
"navigationBarBackgroundColor": "#557dde",
"navigationBarTitleText": "二维码收款",
"navigationBarTextStyle": "white",
"backgroundColor": "#557dde"
}
|
同时在page/example.wxss 中定义背景色
1
2
3
| page {
background-color: #557dde;
}
|
结果如下

同时定义了顶部状态栏的颜色和背景栏的颜色,通常也能够满足需求了。
但是仅仅这样是不够的比如我想像这样
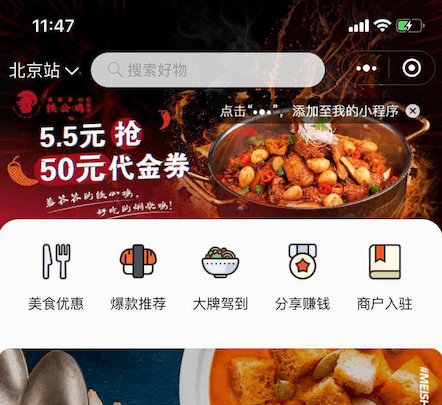
头部图片可以做滑动效果而且展开到整个头部。这时候就需要自定义组件出马了,比如在首页 index.json 中要引入自定义组建
1
2
3
4
5
6
7
8
9
| {
"enablePullDownRefresh": false,
"onReachBottomDistance": 50,
"navigationStyle": "custom",
"usingComponents": {
"nav-bar": "/component/navbar/navbar",
}
}
|
其中最关键的点就是要计算状态栏的各种高度,首先头部导航包括两部分工具栏和 title 栏
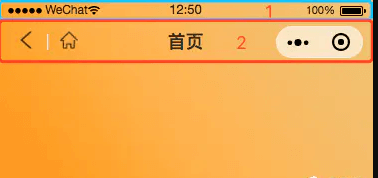
其中上部分是工具栏通过小程序提供的wx.getSystemInfoSync()方法能够拿到系统的一些信息
1
2
3
4
5
6
7
8
9
10
11
12
13
14
15
16
17
18
19
20
21
22
23
24
25
26
27
28
29
| {
SDKVersion: "2.11.3",
batteryLevel: 100,
benchmarkLevel: 1,
brand: "devtools",
deviceOrientation: "portrait",
devicePixelRatio: 2,
fontSizeSetting: 16,
language: "zh_CN",
model: "iPhone 6/7/8",
pixelRatio: 2,
platform: "devtools",
safeArea: {
bottom: 667,
height: 647,
left: 0,
right: 375,
top: 20,
width: 375
},
screenHeight: 667,
screenWidth: 375,
statusBarHeight: 20,
system: "iOS 10.0.1",
version: "7.0.4",
windowHeight: 603,
windowWidth: 375,
}
|
一般情况下 screenHeight - windowHeight 所得到的就是顶部工具栏+title 栏的高度, 但是在自定义了头部组件后即设置了"navigationStyle": "custom",这两个值是相等的,还有一个比较重要的字段 statusBarHeight 通常这个就是代表工具栏的高度而且这个值是值得信赖的。 有个点需要注意就是单位一定要设置为px。
注:由于胶囊按钮是原生组件,为表现一致,其单位在各种手机中都为 px,所以我们自定义导航栏的单位都必需是 px(切记不能用 rpx),才能完美适配。
解决了工具栏部分,主要需要搞定的就是 title 栏的高度了,主要是为了适配胶囊的位置。
官方文档,有一张图片
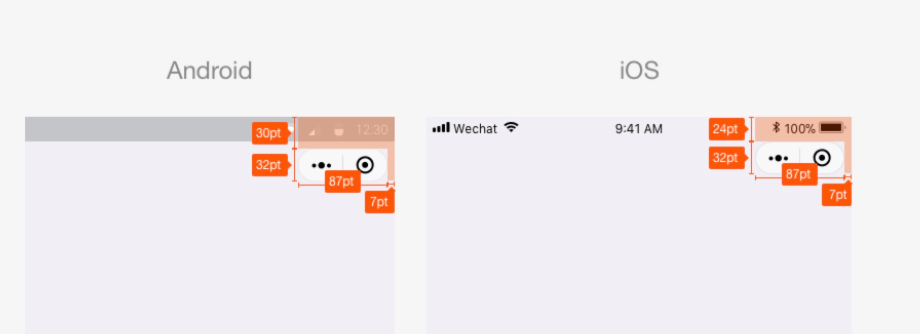
这里安卓跟 ios 的表现是不一样的,胶囊距离工具栏的高度是不一样的,差了 6 个 pt,更闹心的是开发工具跟真机的表现也是不一样的, 不过好在一点就是胶囊的宽和高是一样的都是87*32,我们所做的一切努力都是想让胶囊的上下间距跟跟不自定义组件的显示效果是一样的
真机和开发者工具模拟器上的胶囊按钮不一样
1
2
3
4
5
6
7
8
9
10
11
12
13
14
15
16
17
18
19
20
21
22
23
24
25
26
27
28
| # iOS
top 4px
right 7px
width 87px
height 32px
# Android
top 8px
right 10px
width 95px
height 32px
# 开发者工具模拟器(iOS)
top 6px
right 10px
width 87px
height 32px
# 开发者工具模拟器(Android)
top 8px
right 10px
width 87px
height 32px
可以看出,iOS胶囊按钮与状态栏之间距离为:4px, Android为8px,是不是所有手机都是这种情况呢?
答案是:苹果手机确实都是4px,安卓大部分都是7和8 也会有其他的情况
(可以自己打印getSystemInfo验证)如何快速便捷算出这个高度,请接着往下看
|
粗暴计算方法一
自定义导航栏所有机型的适配方案,简单粗暴根据上面规律来计算胶囊的位置
代码片段
1
2
3
4
5
6
7
8
9
10
11
12
13
14
15
16
17
18
19
20
21
22
23
24
25
26
27
28
29
30
31
32
33
34
35
36
37
38
39
40
41
42
43
44
45
46
47
48
49
50
51
52
53
54
55
56
57
58
59
60
61
62
63
64
65
66
67
68
69
70
71
72
73
74
75
76
77
78
79
80
81
82
83
84
85
86
87
88
89
90
91
92
93
94
95
96
97
98
99
100
101
102
103
| /**
* 获取胶囊按钮位置
*/
getMenuPosition () {
let top = 4
let right = 7
let width = 87
let height = 32
if (systemInfo.platform === 'devtools' && systemInfo.system.indexOf('Android') === -1) {
top = 6
right = 10
}
else if (systemInfo.platform === 'devtools' && systemInfo.system.indexOf('Android') != -1) {
top = 8
right = 10
}
else if (systemInfo.system.indexOf('Android') != -1) {
top = 8
right = 10
width = 95
}
return {
top: systemInfo.statusBarHeight + top,
left: systemInfo.windowWidth - width - right,
width: width,
height: height
}
}
/**
* 获取工具栏样式
*/
getStatusBarStyle () {
let statusBarPosition = {
top: 0,
left: 0,
width: systemInfo.windowWidth,
height: systemInfo.statusBarHeight
}
return this.formatStyle(statusBarPosition)
},
/**
* 获取导航栏样式
*/
getNavigationBarStyle () {
let menuPosition = this.getMenuPosition()
let navigationBarPosition = {
top: systemInfo.statusBarHeight,
left: 0,
width: systemInfo.windowWidth,
height: (menuPosition.top - systemInfo.statusBarHeight) * 2 + menuPosition.height
}
return this.formatStyle(navigationBarPosition)
},
/**
* 获取导航样式
*/
getNavigationStyle () {
let menuPosition = this.getMenuPosition()
let padding = systemInfo.windowWidth - menuPosition.left - menuPosition.width
let navigationPosition = {
top: menuPosition.top,
left: padding,
width: systemInfo.windowWidth - padding * 3 - menuPosition.width,
height: menuPosition.height
}
return this.formatStyle(navigationPosition)
},
/**
* 获取胶囊按钮样式
*/
getMenuStyle() {
return this.formatStyle(this.getMenuPosition())
},
/**
* 格式化Style
*/
formatStyle (position) {
let styles = []
for (let key in position) {
styles.push(`${key}: ${position[key]}px;`)
}
return styles.join(' ')
}
wxml 文件如下
<view>
<view class="status-bar" style="{{ statusBarStyle }}"/>
<view class="navigation-bar" style="{{ navigationBarStyle }}">
<view class="navigation" style="{{ navigationStyle }}">
这是最佳可操作区域
</view>
</view>
<view class="menu" style="{{ menuStyle }}"/>
</view>
|
总结一下这种计算只是区分了最常规的几种显示方案,包括开发工具的安卓,开发工具的 IOS, 真机的安卓,真机的 IOS,只是囊括了最通用的显示方案,但是如果真机范围足够广的话应该会有问题,需要对出现问题的机型逐一兼容。
拼多多+官方不稳的方案二
其实官方提供了一个方法来获取胶囊的位置
wx.getMenuButtonBoundingClientRect
,但是这个方法可能获取不到或者根本不准确
问题列表如下:
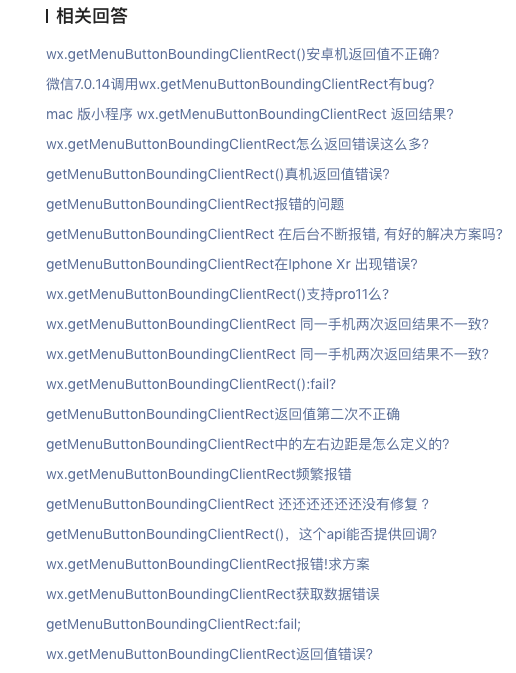
到目前为止还是没有完美解决这个问题,所以该方法还是要慎重使用。
1
2
3
4
5
6
7
8
9
10
11
12
13
14
15
16
17
18
19
20
21
22
23
24
25
26
27
28
29
30
31
32
33
34
35
36
37
38
39
40
41
42
43
44
45
|
try {
const systemInfo = wx.getSystemInfoSync();
rect = wx.getMenuButtonBoundingClientRect ? wx.getMenuButtonBoundingClientRect() : null;
if (rect === null) {
throw 'getMenuButtonBoundingClientRect error';
}
if (!rect.width) {
throw 'getMenuButtonBoundingClientRect error';
}
} catch (error) {
let gap = '';
let width = 96;
if (systemInfo.platform === 'android') {
gap = 8;
width = 96;
} else if (systemInfo.platform === 'devtools') {
if (ios) {
gap = 6;
} else {
gap = 8;
}
} else {
gap = 4;
width = 88;
}
if (!systemInfo.statusBarHeight) {
systemInfo.statusBarHeight = systemInfo.screenHeight - systemInfo.windowHeight - 20;
}
rect = {
bottom: systemInfo.statusBarHeight + gap + 32,
height: 32,
left: systemInfo.windowWidth - width - 10,
right: systemInfo.windowWidth - 10,
top: systemInfo.statusBarHeight + gap,
width: width
};
console.log('error', error);
console.log('rect', rect);
}
|
通过兼容官方的wx.getMenuButtonBoundingClientRect方法,再加上方法一中的设定默认值的方案基本就能满足所有场景了。
swiper 高度问题
我们开发时还有这样一个问题比如我们需要使用swiper组件,但是问题就是, swiper 中的内容高度是 100%的,这样如果在 swiper 中同时有上滑加载更多
就会有内容显示不全的问题,为了解决这个问题我用的方法一是动态调整 swiper 内容的高度,代码如下
方法一
1
2
3
4
5
6
7
8
9
10
11
12
13
14
15
16
17
18
|
<swiper style="width:100%; height: {\{swiperHeight px;}\}" >
<block wx:for="{{types}}" wx:key="*this" wx:for-item="currentType">
<swiper-item>
<view id="start_view" class="start-view" wx:if="{{couponType === currentType}}"></view>
<view class="tips-con" wx:if="">
<view class="tips-item">若小程序定位已开启</view>
<view class="tips-item">请进入系统“设置”-“隐私”-“定位服务”中打开开关</view>
<view class="tips-item">允许使用定位系统</view>
<view class="btn open-setting-btn" bindtap="openSetting" wx:if="">
开启定位
</view>
</view>
<view id="end_view" class="start-view" wx:if="{{couponType ===currentType }}"></view>
</swiper-item>
</block>
</swiper>
|
其中swiperHeight是动态参数, 我们在请求拿到数据后,通过 setData({ list,}) 之后,获取 start_view 和 end_view 之间内容的高度来重新计算高度
1
2
3
4
5
6
7
8
9
10
11
12
13
14
15
16
17
| autoHeight() {
wx.createSelectorQuery()
.select("#end_view")
.boundingClientRect()
.select("#start_view")
.boundingClientRect()
.exec((rect) => {
let _space = rect[0].top - rect[1].top;
this.setData({
swiperHeight: _space,
});
});
}
|
方法二
方法一我们只是用了swiper组件,另一种实现方式是同时使用 swiper 和 scroll,
计算可视内容高度然后将 scroll 设置成固定高度,向上拖动自动追加新内容,只需要计算一次
统一请求拦截
小程序发送请求我们会使用wx.request,如果需要设置统一的Content-Type或者在headers带上token, 就需要将请求封装
参考文档